
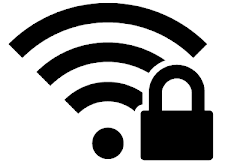
How to Secure a Wireless Wi-Fi Network
 With the world
going wireless in every sphere of technology, the question of security
has often been raised. The same is true for wireless internet networks
or Wi-Fi networks with hackers and Wi-Fi intruders always looking for
ways to gain access to unsecured networks. There are several reasons why
you might want to protect your Wi-Fi network. Prominent among them
include better privacy, reduced internet bills and faster internet speeds.This
post contains few simple techniques you can use to make sure that your
wireless network is as secure as it possible can be.
With the world
going wireless in every sphere of technology, the question of security
has often been raised. The same is true for wireless internet networks
or Wi-Fi networks with hackers and Wi-Fi intruders always looking for
ways to gain access to unsecured networks. There are several reasons why
you might want to protect your Wi-Fi network. Prominent among them
include better privacy, reduced internet bills and faster internet speeds.This
post contains few simple techniques you can use to make sure that your
wireless network is as secure as it possible can be.Protect your Wireless Internet Network
1) Encrypt your Wi-Fi Network: When you use a Wi-Fi network for accessing the internet, every piece of data you send and receive over the air can be easily snooped by anyone with the right set of tools. Packet sniffers can be used by even the most novice of users to sniff your data. This means that a hacker can not only see which websites are you accessing but also get the login details of your personal and professional accounts.Encryption basically involves scrambling the data that is transmitted and received by you while using a wireless network. This means that even if a hacker intercepts your data transmission, (s)he will not be able to exploit the information contained within it.
There are two encryption standards available that you can use: WEP (Wired Equivalent Privacy) and WPA (Wireless Protected Access). WEP is the older standard of encryption and can now be bypassed in a matter of minutes. WPA is relatively newer but it still has security holes. AirCrack and coWPAtty are two free tools that allow anyone to easily crack WEP and WPA encryption using bruteforce technique. WPA2 is the latest standard and is what you must use if you want the highest level of protection for your wireless network. The encryption keys used change each time a device accesses the network making WPA more difficult to hack.
The encryption used by all devices in the network must be the same for the network to work properly. Your network will only be as secure as its least secure device. Make sure all devices you use support WPA2 encryption. Use a strong encryption key. Make sure that it is longer than 10 characters and contains a mixture of capital and small letters, numbers and symbols. Do not use common words and stuff that people can guess about you as your password.
2) Replace default passwords on your router with strong passwords: The biggest mistake most wireless internet users make is not changing default passwords on their routers. Hackers utilize public databases that contain default passwords and usernames from virtually every manufacturer. This enables them to change the security settings of your router according to their needs. Using a strong password for your router ensures that hackers and miscreants cannot change your network's security settings. To change the password on your router, visit Administration settings on your router's settings page. Also, do not store passwords in browsers as they can be easily made visible.
3) Change default SSID
Your network's SSID or Service Set Identifier is the name of your wireless network. Usually, the SSID is the name of the router's manufacturer along with the model number of the router. Changing it to not display this information prevents you from giving additional information about your router to prospective hackers.
4) Do not broadcast your SSID
Hiding SSID prevents unsophisticated and inexperienced hackers and wifi intruders from determining that your network exists. Hiding your SSID is relatively easy and the option to do so is usually under basic wireless settings on your router's settings page. However, it is important to note that some devices, including those running newer versions of Windows, will show every network even if they cannot identify its name. Moreover, your network will still contain the SSID in data packets making unmasking ridiculously easy with tools like inSSIDer, Kismet and Commview for WiFi.
5) Use scary names to discourage Wi-Fi theft: If your wireless network has a name like C:\virus.exe, most people who might otherwise access your network will not for the fear of getting their devices infected. You can use your creativity to find more dangerous names for your wireless network.
6) See Connected Devices List: Almost every new router will have a page which displays the list of every device that is connected to the network. You should check this page at regular intervals to see that unknown devices are not leeching your network. When you see an unknown device, you can be certain that someone has breached your network. You can try AirSnare, a free utility which scans your network for unexpected MAC addresses and also looks into DHCP requests.
7) Turn off Guest networking: While most routers will have guest networking disabled by default, it always pays to see that you may not have accidentally enabled it. Guest networking allows others to access your network.
8) Enable MAC address based filtering: Media Access Control or MAC address identifies each device connected to your network. MAC address is an alphanumeric key separated by colons. Enabling MAC address based filtering allows only devices having particular MAC addresses to access your network. You need to enter the MAC address of every device you wish to allow to connect to your network on your router's settings page. This prevents unknown devices from connecting to your network even if they know your password. To find the MAC address of your computer, open command prompt and execute “ipconfig /all” without quotes.
While it may prevent inexperienced users from getting access to your network, experienced hackers and advanced users can use a wireless network analyzer like Nmap and then change the MAC address of his computer with another free tool MAC Shift.
9) Keep your firmware up to date: Router vendors regularly release firmware updates and post them on their websites. You should occasionally check the manufacturer's website to see if a new firmware update has been released. Newer routers will automatically inform you when new firmware is available.
10) Reduce wireless signal range: If you reduce the range of your wireless network, common sense tells that it will prevent hackers located at a distance from detecting your network. This has the advantage that if hackers do not know that a wireless network exists, they will not try to break into it. You can place your router at places which would block the Wi-Fi signals. While this technique is advantageous, a hacker keen on hacking into your network will just have to use a larger antenna to pick up your router's signals. Moreover, reducing the range of your wireless network might cause troubles for genuine users.
11) When not using your internet network, turn it off: This is self explanatory. If you are not using your network, turning it off saves you from giving extra time to hackers to try and hack into your wireless network. While it may be impractical to turn every device on your network off every time you are not using the network, it still is advisable to do so during extended periods of non use.
If you follow all these techniques, your Wi-Fi network will be a lot more protected and hackers will have a tough time breaking into it.


