Showing posts with label WINDOWS. Show all posts

4/23/2014

Change Processor Name Permanently

A while ago on Tweak And Trick, I published an article on changing your processor name. But recently, Anil Kumar pointed out that the trick only changed the name temporarily.

After a user restarts his computer, the name reverted back to original which is obvious as each time Windows boots, it checks the connected hardware and updates the registry value automatically. So, changing the processor name using the earlier article did not had permanent effect on the processor name.

Thus, the alien processor name you had earlier again reverted back to the boring old one.


Change Processor Name Permanently

Problem: To, make the name change permanent, it was required that the user updates the Processor Name String registry key each time when Windows starts.

Solution: It is very easy to change your processor name permanently by creating a registry key and placing a shortcut to it in the windows start up folder. To do so, just follow the steps given below:-


Steps :-
1.  Open Notepad.
2.  Copy and paste the exact code given below:-

Windows Registry Editor Version 5.00

[HKEY_LOCAL_MACHINE\HARDWARE\DESCRIPTION\System\CentralProcessor\0]
"ProcessorNameString"="My Processor name 50000MHz"
To change the processor name, edit the part of the code given in blue. Also understand that \0 in the above code should only be present if Windows store your processor name at that location. Please open Registry Editor and navigate to the above mentioned keys to check whether or not to include the \0.

3.  Click on File Menu, click on Save As and select "All Types" in Save as Type option. Save the file as ProcessorNameChange.reg or *.reg.
4.  Create a new shortcut on your desktop. Enter regedit / S "Location of the .reg file" as the location of the item. For example, enter regedit /S "C:\Processor Name.reg" if your registry file is located in the root of C:\ drive.

Processor Name

5.   Copy the created Shortcut file.
6.  Navigate to C:\Documents and Settings\All Users\Start Menu\Programs\Startup (in Windows XP) or to C:\Users\ User-Name\AppData\Roaming\Microsoft\Windows\Start Menu\Programs\Startup (in Windows 8, Windows 7 and Windows Vista. Also remember that AppData is a hidden folder.)  if C: is your System drive.
7.  Paste the copied file.


This registry file would now execute each time when Windows starts and the Processor Name String would be modified each time. So, even upon restarting your computer, you will see that the changed processor name is permanent.

Show Administrator Account on Welcome Screen In Windows

Windows automatically creates an Administrator account during installation process which is by default hidden from view on the welcome screen. This article will show you a trick using which you can easily show and enable the administrator account on the welcome screen in Windows XP, Vista, 7 and 8.

Most of the time we require access to the hidden administrator account in windows to change passwords or to perform system tasks limited only to system administrators. The hidden nature causes great problem if you are using the welcome screen as you might be forced to use the classic login screen to access the account. Here is the solution to this problem.

Before going into the ins of this tweak, let me remind you that this trick requires editing the registry, so you must take utmost care not to do it wrongly and mess your computer up. If you have any doubt, you can always comment and ask before trying it out practically.


Show Administrator on Welcome Screen

So now let us begin this article. The steps to enable the administrator account are as follows:-
  1. Click on the Start.
  2. Windows XP users click on Run. Windows 7, Windows 8 and Windows Vista users type 'run' in the search bar.
  3. Type "regedit" (without quotes) in the open field and press enter.
  4. Navigate to HKEY_LOCAL_MACHINE\ Software\ Microsoft\ WindowsNT\ CurrentVersion\ Winlogon\ SpecialAccounts\ Userlist .
  5. Right Click in the Work Area and create a new DWORD entry.
  6. Name it as Administrator and change its value to 1.
  7. Exit Registry Editor and Reboot/ Restart your computer to apply the changes.
To hide the administrator account on the welcome screen, change the value of Administrator DWORD to 0 in Step 6.

After using this trick , you will be able to view the administrator account on the welcome screen every time you log on.

Disable USB ports on Windows PC via Registry

With this trick, you can disable access to your USB(Universal Serial Bus) ports in your Windows based PC to prevent people from taking out data from your personal computer without permission or spreading viruses through the use of USB(pen and flash) drives.

To use this trick to disable USB ports, follow the steps given below:-


  1. Click on Start.
  2. Click on Run. If you cannot find RUN, type it in the search box.
  3. Type "regedit" without quotes. This will launch the Registry Editor.
  4. Navigate to  HKEY_LOCAL_MACHINE\SYSTEM\CurrentControlSet\Services\usbstor.
  5. In the work area, double click on Start.
  6. In the Value Data box, enter 4.
  7. Click on OK.
  8. Close Registry Editor and refresh your desktop.
  9. To re-enable access to your USB ports, enter 3 in the Value Data box in Step 6.

Disable access to USB ports on your PC using Registry Editor

Try it yourself to make your PC invulnerable from data theft and malware which spread through USB ports. This works on Windows XP, Windows Vista, Windows 7 and Windows 8.

Note: This trick also disables access to your USB connected peripheral devices. So, do not use it if you have USB connected keyboard and mouse.

4/22/2014

5 Essential free Software for Windows PC

Imagine, you have a new high end PC with Windows installed. You switch on the PC in excitement only to ask yourself the question, what should I do now? Even the most high end hardware is useless without the right software. This article deals with such five essential software for your PC that do not put any dent on your pocket. For convenience purposes, each software is provided according to the category of its usage. So lets begin.

All the freeware mentioned support all versions of Windows including Windows XP, Windows Vista, Windows 7 and Windows 8.

1.  Browsers: It is fair to say that for majority of PC users, surfing the internet is the only major use for their PC. So, it would have been unfair to begin this list with any other category. Although, Windows comes with Internet Explorer, it would not be totally wrong to say that IE is no more than an average web browser. So an alternative web browser is an absolute necessity. Coming to the point, there are two major contenders for inclusion in this category. So, I was unsure which one to choose. So I decided to include them both. (I have intentionally not numbered the browsers)

a. Mozilla Firefox: Mozilla is not totally wrong to say that the Firefox Web browser is the faster, more secure, and fully customizable way to browse the web. Firefox is one of the most complete browsers available. It is considered to be the first browser to shake Internet Explorer's dominance. One of the good things about Firefox is that it keeps up with the needs of time. Another cool thing about Firefox is that it has a perfect score in Acid 3 test. Firefox wins the race with other browsers in terms of available themes, plugins, and security. Overall, Firefox is a must have browser on your PC.


free software

b.  Google Chrome: When Google does something, it is huge and the same is true for Google Chrome. Everything was looking settled in the browser market when Google all of a sudden came up with their new browser with the unique thought of building it almost from scratch. Google's Chrome is currently the fastest browser on the planet with tremendous JavaScript rendering capabilities. Like Firefox, Chrome has a perfect score in Acid 3. Themes and plugins also make Chrome a totally customizable browser. Overall, Chrome is fast, safe and customizable. If you have no problem with Google's products, Chrome is a must have browser on your PC.


Software for Windows

2.  Media Player: If we check our hard drives, one thing which most of us will find on them is media. To play that media, we need a media player. So a media player is important for most PC users. One can say that Windows comes with Windows Media Player, so why is another media player needed? To them, I say that Windows Media Player does not have the ability to play all the media formats unless you install the necessary codecs. So, a media player which comes with almost all codecs installed is needed. There is one such media player available. It is VideoLAN's free offering, VLC Media Player.

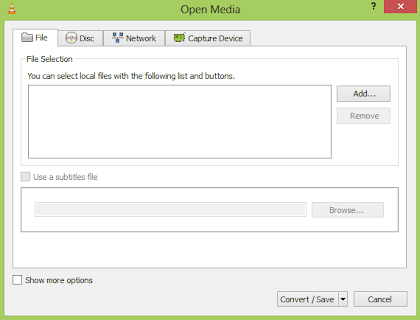
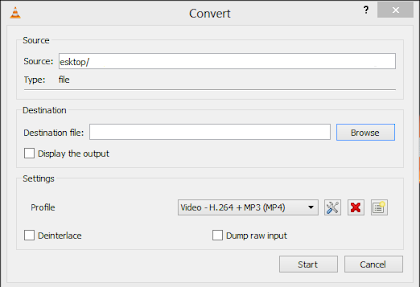
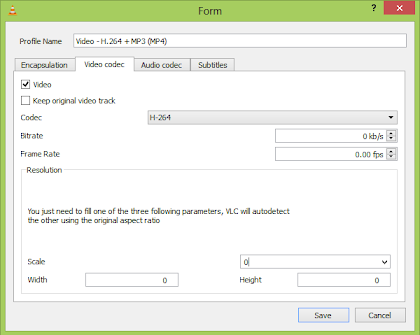
 VLC  Media Player: VLC Media Player is an open source, multi-platform media player that comes with almost all of the codecs required to play all different types of media on your PC. So you do not have to worry about installing codecs to play your files. Moreover, the best part about VLC media player is that being open source, you can install it on almost any operating system. Moreover, VLC media player is portable so you can carry it in your flash drive. All this combined with stability, performance, ability to convert and cut videos make VLC Media Player an absolute essential software.


freeware VLC Media Player

3.  Image Viewer: Well most of us like to take images, and most of us like to edit them as well. This leads to a large amount of images in different formats. The inbuilt image viewer in Windows is not all that bad but the problem arises when we try to open files of different formats. Imagine this situation, you have a great collection of images which are of different formats. Now you invite your friends to show those images. But you have one problem, Windows Image Viewer is not opening the images as they are of unsupported formats. What do you do? Well you install Irfan View with plugins.

Irfan View: Irfan View is developed by Irfan Skiljan, a student at the University of Vienna in 1996. Irfan View is one of the most popular image viewer worldwide. Irfan View gets downloaded over 1 million times each month. One of the major advantages of Irfan View is that it has a light interface, is fast in opening images and can open virtually every type of image image file possible. It can even open Flash files and also serves as a small media player as it can play movie files and mp3 files as well! And that is not all, Irfan View can be used to do minor image editing as well.

Some of its features are:
Slide show, batch conversion, Acquiring from a TWAIN source, Batch acquire or scan, adding text to photos, converting to greyscale, enhancing colours and even capturing screen shots. Honestly, that is not even 5 % of what Irfan View is capable of. All this at a tremendously small size make Irfan View a must have essential.

Irfan View Plugins can add further functionality to this already great software.

essential freeware

4.  Security: This could well be the most important category of this article. Security of a PC is the most important thing in the cyber world now. There was a time when this was not essential but those were the good old days. Now one cannot even think of browsing the web without having an anti virus or anti spyware installed. Big organizations and corporate companies spend millions for securing their network but you don't have to. There are some free tools which do the job equally well without costing you a penny. (To read a full article on securing your PC, visit How to Improve your Cyber Security.)

There were many alternatives to include in this category. So I decided to include the most popular one which is presumably AVG Free Edition.

AVG Free Edition: AVG is a popular antivirus with a slick interface having the ability to detect viruses and spywares. It receives updates frequently and is light on resources. Some of its key features are Automatic Update Functionality, Resident Shield, Email Scanner, free lifetime database updates for home users, Anti Spyware, Anti Virus, AVG toolbar and Search Scan. All these premium features are available free of cost in AVG making it a must have free anti virus/spyware for your PC.


AVG Anti-virus
 
5.  Office Suite: An office suite has become an absolute necessity these days. We use it to create text documents,presentations, making tables, graphs, recording data, managing schedules,creating spreadsheets and workbooks. A full fledged Office Suite like Microsoft Office will cost you no less than 500 USD (Rs. 25000). That is too high a price for any user. So what should one do? Well, use the Open Office Suite instead.

Open Office Suite: Open Office Suite is an open source, multi lingual, multi platform project developed by Sun Micro systems. Among all the Office Suites available, Open Office is considered to be the only worthy competitor to Microsoft Office. It is fast, available in many languages, works on all computers, stores all data in an international open standard format, read and write files from other common office packages and the best of all, is free of charge for any purpose(commercial or private). It can even edit PDF files.

Open Office Suite

These freeware will definitely help you to make your PC more usable. Although there are many more free software for Windows that are worthwhile, these 5 are an absolute must for a freeware dominated Windows PC.

Create a Shortcut to lock your Computer

Have you ever left your PC in a hurry? Have you ever felt that it is a pain to lock your system in the simple way of doing CTRL+ALT+DEL? I would imagine that you have and then, this trick is for you. This trick enables you to create a shortcut to lock your computer instead of doing the regular CTRL+ALT+DEL, thus providing you a way to quickly and easily get away from your PC whenever you are in a hurry.

To use this trick, follow the instructions given below:-

Steps

  1. Right Click on an empty slot on Desktop, point to New and click on Shortcut.
  2. In the dialog box that pops up, type the following code without quotes in the Type the location of the item.
rundll32 user32.dll,LockWorkStation
     3.  Click on Next and type a name for the shortcut in the Type a name for this 
          Shortcut textbox.
     4.  Click on Finish.

Create a Shrtcut to lock your System

Now you will be able to lock your computer by double clicking on the created shortcut. You can also add this shortcut to Quick Launch toolbar to lock your system with only a single click.

Make Undeletable, Unrenamable Folders

Have you ever wondered how you can make a folder which neither can be deleted nor be renamed. Well, if you have, then you have come to the right place. With this trick, you will be able to create folders in Windows which cannot be renamed or deleted.

Basic Concept
The basic concept behind this trick is the use of Keywords. Keywords are reserved words in any programming language that cannot be used as names of variables. Windows also uses certain keywords in its programming. Some of them are con, aux, lpt1, lpt2, lpt3, lpt4, lpt5, lpt6, lpt7, lpt8 and lpt9.

Make Undeletable and unrenamable folders

A Test
To test this concept, make a new folder in Windows and try to give it a name same as any keyword suggested above.

Result
Windows will not rename your folder to any of the keyword given above.

Trick
So the question arises, how can we make a folder with a keyword as its name? The solution to this problem is included in Windows itself. As we know that Windows has evolved from D.O.S.(Disk Operating System), its commands can be used in Windows. You can use D.O.S. Programming in Windows to create a folder with a keyword as its name using the steps given below:-

  1. Click on Start.
  2. Click on Run. Type in "cmd" without quotes.
  3. In the Command Prompt Window that opens, type the name of the drive you wish to create your folder in the format <drive-name>: and press Enter. e.g. If you wish to create the undeletable folder in D drive, type "D:" without the quotes. Note that the folder cannot be created in the root of C:/ drive (if C: is your system drive).
  4. Type this command- "md con\" or "md lpt1\" without the quotes and press Enter. You can choose any of the keywords given above as the name of your folder.

Now Windows will create an undeletable, unrenamable folder in the drive you entered in Step 3. However the folder can be renamed to another keyword using Windows Explorer.

Deleting the Folder

Although it is not possible to manually delete the folder, you can delete the folder by typing "rd con\" or "rd lpt1\" in Step 4 instead of "md con\" or "md lpt1\".

Windows Compatibility: This works on Windows XP, Windows Vista, Windows 7 and Windows 8.

Try it yourself to create one such folder which can neither be deleted nor be renamed.

Shutdown Your Computer or a Remote PC via Command Prompt

Most of us shutdown our computers using the power button given in the Start menu. Some of us use the physical power button on our machines. Very few people actually use other means of shutting down a computer and even less is the number of people who use the command prompt to shutdown a computer.

A reason for this is that most of us don't know that the command prompt can be used to not only shutdown, restart or log off our computer instantly but also to shutdown a remote computer provided you have administrative access. It can also be used to hibernate a computer and give a comment containing the reason for shutdown. This post will show you how to do all this.


Shutdown computer with command prompt
Required
A computer running Windows (XP, Vista, 7 or 8) with the command prompt working perfectly, i.e. not disabled by a virus.

Initial Steps
1) Press Windows Key + R.
2) Enter CMD and press Enter.

This will start the command prompt. Follow the instructions below depending on what you want to do.

Shutdown Local Machine (Your Computer)
Type "shutdown -s" without the quotes in the command prompt and press Enter. Shutdown is the command being executed and the switch -s tells the computer to shutdown.

Restart your Local Computer
Type "shutdown -r" in the command prompt and press Enter. In this case, the command switch -r is telling the computer to restart after shutdown.

Log Off the Current User
Type "shutdown -l" in the command prompt and press Enter. The -l command switch tells the computer to log off.

Shutdown a Remote Computer
Type "shutdown -s -m \\name of the computer" in the command prompt and press Enter. Replace \\name of the computer with the actual name of the remote computer you are trying to shutdown. As mentioned earlier, you must have administrative access to the computer you are trying to shutdown. To know if you have administrative access, press Windows key + R and then type the name of the computer and press Enter.

Note: If you don't remember the name of the remote computer, you can look for it by opening a list of all the computers you are connected to by executing "net view" in command prompt.

If you can connect to the computer, you will be asked to login with your username and password. Upon entering them, a window will display the list of all the directories available to you. This should help you know whether you can or cannot shutdown the remote computer.

Hibernate a Local Computer
Type in "Rundll32.exe Powrprof.dll,SetSuspendState" without the quotes and press Enter. Your computer should hibernate, if it does not, then you must enable hibernation to do this.

Shutdown your or a remote computer after a specific time
Type "shutdown -s -t 60" to shutdown your computer after 60 seconds. Upon executing this, a countdown timer displaying a warning message will be shown. This command uses the -t command switch followed by a variable (which is 60 in this case) which represents the number of seconds after which the computer will shutdown.

Display a Message containing the reason for shutdown
Type shutdown -s  -t 500 -c "I am tired. I don't want to work anymore." (with the quotes) in the Command Prompt and press Enter. The -c switch is used in the code to give the reason for shutting down and what is followed in quotes will be displayed in the dialog box as the reason. This can be used to display all sorts of funny messages. One example :-

Skynet has become self aware. John Connor did not stop me. You can not use your PC anymore.

Stop a System Shutdown
Type "shutdown -a" and press Enter. This will stop the system from shutting down if the countdown to shut down has not reached 0.

How to Start Windows in Safe Mode Easily

Safe Mode is a special diagnostic mode in which Windows runs with the minimum amount of features. As the features are limited, Windows does not load unnecessary startup items and runs only those files and drivers that are necessary for the basic functioning of the operating system. This allows users to remove recently installed programs that might be preventing Windows from starting correctly. As Windows does not start unnecessary programs while in Safe Mode, Safe Mode can also be used to remove viruses and malware that cannot be removed normally without risking the infection getting worse.


Start Safe mode Windows
There are different ways in which you can get into the Safe Mode in Windows. They depend on the version of Windows you are using.

In this article:
  1. Steps for Windows 8 users
  2. Steps for Windows 7, Windows Vista, Windows XP and users of previous versions
  3. Force Windows to start in Safe mode
  4. Which Safe Mode option should you choose?

Windows 7, Windows Vista, Windows XP and Previous versions

If you are using these versions of Windows, you can try the following methods.

The Trusted F8 key method
1) Restart your computer if it is on.
2) Right before the system starts to boot, start tapping the F8 key continuously.
3) This should load the Windows Advanced Options boot menu.
4) Select a Safe Mode option based on your need using the arrow keys and press Enter.
5) Windows will start in Safe mode. To get out of Safe mode, simply restart your computer.

This method should work on Windows 7, Windows Vista, Windows XP, Windows 2003 and Windows ME. However, if it does not, you can always force Windows to boot in Safe Mode if your computer is working "properly".

Faulty Startup Method
If the F8 key method does not take you to the Advanced Options boot menu, you could try turning your computer off when it boots into Windows. Upon next restart, Windows will notice that the computer did not boot successfully and take you to the Advanced Options boot menu. Then, select a Safe mode option based on your need. This method is risky and should only be tried as a last resort. It could result in some of your files being deleted which could make your Windows installation unusable.

Windows 8

The F8 key method does not work on Windows 8. Hence, getting onto Safe Mode requires the following steps:-

If your PC is working properly:
1) On Windows 8 Start Screen, type Advanced. In the search results, click on the Settings category.
2) Click on Advanced startup options.
3) Under the Advanced Startup heading at the bottom of the General Settings screen, click on Restart now.
4) Your computer will restart and you will be taken to the Advanced Startup Options menu. To easily reach this menu, on Windows 8 start screen, you could choose restart while holding the Shift key.
5) Click on Troubleshoot and then on the Advanced Options button.
6) Now, click on Startup Settings.
7) At the Startup Settings Screen, click on Restart.
8) Your computer will restart to Advanced Boot options from where you can choose a Safe mode option based on your need.

Windows 8 Safe mode

You can also force Windows to start in Safe mode.

If your PC is not working properly:
Windows 8 monitors your PC's startup for problems and when an error is detected, it automatically takes you to the new Recovery mode with the message "Recovery. It looks like Windows didn't load correctly." In this case:-

1) Select Advanced Repair Options and then click on Troubleshoot.
2) Click on the Advanced Options button.
6) Now click on Startup Settings.
7) At the Startup Settings Screen, click on Restart.
8) Your computer will restart to Advance Boot Options from where you can choose a Safe mode option based on your need.

Force Windows to restart in Safe Mode using the System Configuration Utility

Most users looking to boot Windows in safe mode will have a computer that is not working properly. Unfortunately, this method will not help them as it requires the user to have a working computer.

Start Windows in Safe mode

Steps:
1) On Windows 7, Windows Vista, Windows XP and previous versions of Windows, click on Start. Go to Run in Windows XP and previous versions and go to Search in Windows 7 and Vista. On Windows 8, go to the Start screen. Alternatively, press Windows key+R to load the Run dialog box.
2) Type msconfig and press Enter.
3) This will start the System Configuration Utility.
4) On Windows XP, go to the BOOT.INI tab and check /SAFEBOOT. On Windows 8, Windows 7 and Windows Vista, go to the Boot tab and check Safe Boot.
5) Click OK.
6) Click on Restart in the following dialog box.-

Your computer will restart in Safe mode.

Different Safe Mode Options. Which to choose?

These are the various safe mode options available in Windows. You can choose one based on the features you require.


Safe Mode
This is safe mode in its most basic form without any extra features. It is useful for troubleshooting most common problems .

Safe Mode with Networking
This offers additional support of connecting to the internet or any other network. This is useful when your PC has a problem which might require you to frequently use the internet to troubleshoot.

Safe Mode with Command Prompt
This option will allow you to use all the unique features of the Windows command prompt while in Safe mode.

Convert FAT32 to NTFS Without Formatting or Losing Data

You have a flash drive or probably an external hard drive that currently has FAT32 file system and you want to change it to NTFS, because FAT32 does not support handling large files (over 4GB) or it is just simply old for your taste but there is just one problem, you don't want to lose your saved data. This article is for you then as it explains exactly how you can achieve seamless transition from FAT to NTFS without involving any data loss.


FAT32 to NTFS

While it is generally recommended to use the NTFS file system because of its stability, security and lesser defragmentation time, most of us end up using FAT32 because that is what most disks are preformatted with. Unless, we notice the “Not enough disk space error” despite disk space being available, we don't bother to change the file system. Moreover, most of us don't change it because of the risk of losing important data and lack of time (read laziness). As Microsoft was aware of this scenario, they added a capability in the command prompt to overcome this by executing a simple command. There are many software that support this too but the Convert command is one of the easiest ways to do so. Follow the steps below to know how:-

Important: While this method works perfectly, I would still advise you to backup your data in case anything goes wrong.

FAT 32 to NTFS Conversion Steps

1) Go to Computer, and note the name of the drive whose file system you wish to convert.
2) Click on Start.
3) Type cmd in the search bar if you use Windows 7, Windows 8 or Windows Vista. If you use Windows XP, click on Run and then execute cmd.
4) Execute "chkdsk h: /f " (without quotes) where H is the letter of the drive to undergo conversion. This checks the drive for errors and fixes them automatically.
5) Execute "Convert H: /FS:NTFS" (without quotes). H is again the letter of the drive to be converted.
6) The command prompt will start the conversion process and after a few minutes, CMD will say that conversion was successful.
7) You can check it in the properties of the drive through right click<Properties.

Convert FAT to NTFS

This works on Windows 7, Windows XP, Windows 8 and Windows Vista. I converted my flash drive's file system using these steps and it worked flawlessly. It is interesting to note that this method cannot be used to reconvert NTFS file system back to FAT32. To reconvert back to FAT32, you will need to format the entire drive which will definitely cause data loss.

4/21/2014

Make your Computer Welcome You

Do you watch movies? Have you always loved the way how Computers in movies welcome their users by calling out their names? I bet that you too would want to know how you can achieve similar results on your PC and have a computer said welcome.

Then you are at the right place, this article describes exactly how you can make your computer welcome you like this.

With this trick, you can make your Computer welcome you in its computerized voice. You can make your Windows based computer say "Welcome to your PC, Username."

Make Windows Greet you with a Custom Voice Message at Startup

To use this trick, follow the instructions given below:-


  1. Click on Start. Navigate to All Programs, Accessories and Notepad.
  2. Copy and paste the exact code given below.
Dim speaks, speech
speaks="Welcome to your PC, Username"
Set speech=CreateObject("sapi.spvoice")
speech.Speak speaks
     3.  Replace Username with your own name.
     4.  Click on File Menu, Save As, select All Types in Save as Type option, and save the file as Welcome.vbs or "*.vbs".
     5.  Copy the saved file.
     6.  Navigate to C:\Documents and Settings\All Users\Start Menu\Programs\Startup (in Windows XP) and to C:\Users\ {User-Name}\AppData\Roaming\Microsoft\Windows\Start Menu\Programs\Startup (in Windows 8, Windows 7 and Windows Vista) if C: is your System drive. AppData is a hidden folder. So, you will need to select showing hidden folders in Folder options to locate it.
     7.  Paste the file.


 Make your Computer Welcome you at startup

Now when the next time you start your computer, Windows will welcome you in its own computerized voice.

Note: For best results, it is recommended to change sound scheme to No Sounds.
You can change the sound scheme to No Sounds by following the steps given below:-
  1. Go to Control Panel.
  2. Then click on Switch to Classic View.
  3. Then Click on Sounds and Audio Devices.
  4. Then Click on the Sounds Tab.
  5. Select No Sounds from the Sound Scheme option.
  6. If you wish to save your Previous Sound Scheme, you can save it by clicking Yes in the popup menu.
  7. Click on OK.
Change Sound Scheme to No Sounds

Try it yourself to see how it works. In my personal opinion, this is an excellent trick. Whenever I start my PC in front of anybody and the PC welcomes me, the fellow is left wondering how brilliant a computer do I have.

Cool Keyboard Tricks (Windows) : Make a Disco

Keyboards usually have small LEDs which indicate whether different types of locks are activated or not. Here is a trick to use the lights of your keyboard in a more creative manner in Windows.

This trick uses a simple Visual Basic Script which when activated makes your Scroll lock, Caps lock and Num lock LEDs flash in a cool rhythmic way which gives the perception of a live disco on your keyboard.


Keyboard tricks

To make your own live disco, follow the steps given below:-

1. Open Notepad.
2. Copy paste the exact code given below:-

Set wshShell =wscript.CreateObject("WScript.Shell")
do
wscript.sleep 100
wshshell.sendkeys "{CAPSLOCK}"
wshshell.sendkeys "{NUMLOCK}"
wshshell.sendkeys "{SCROLLLOCK}"
loop
3. Save the file as Disco.vbs or "*.vbs".


Cool Keyboard Tricks

Double click on the Saved file to see the LED lights on your keyboard go crazy and make your own cool disco.

This trick has been tested on Windows XP, Windows Vista, Windows 7 and Windows 8 and found to be working perfectly.

You can disable the keyboard disco by starting Task Manager and ending the wscript.exe process.

Watch ASCII Star Wars in Windows XP, Vista, 7 and 8

Every one of us has watched Star Wars on television, computer or in a theater. It is the same movie with aliens fighting each other for galaxies and such stuff. There is nothing new in it. But wait, have you watched an ASCII (American Standard Code for Information Interchange) version of Star Wars and that too in Windows using telnet? A network protocol known only to computer wizards. Well if you have not, then you must do it now!

There is a complete copy of Star Wars done entirely in ASCII characters that you can watch in the Windows operating system (or any OS that supports telnet). The only thing required to watch it is an internet connection; speed does not matter.

A Picture showing Star Wars in command prompt

To watch it on Windows XP, Mac OS X and Linux
  1. Go to Start, Run. (Only for Windows users)
  2. Now type "telnet towel.blinkenlights.nl" without the quotes and press Enter. Users of Mac OS X and Linux can directly execute this code in the terminal window.

On Windows 8, Windows 7 and Windows Vista

Telnet is turned off by default in the latest versions of Windows. So, in order to watch star wars, you must first enable telnet by going to Control Panel › Programs › Turn Windows Feature On or Off and ticking both the telnet check boxes. After doing that, follow the steps given below:-
  1. Go to Start, Search in Windows Vista and Windows 7. On Windows 8, open the main Start page.
  2. Type telnet and press Enter.
  3. In the following command prompt window, type "o" without quotes and press Enter.
  4. Now type "towel.blinkenlights.nl" without the quotes and press Enter.
If you do not need telnet anymore, you can turn it off.

A command prompt window like the one in the image will open with the movie being played in it. See the movie yourself. Did you enjoy watching this new version of Star Wars? Well, I did and know it for sure that you would have too.


Use Keyboard as Mouse

If your mouse is not working and you don't wish to wait till you get a new mouse, you would definitely like to know how you can use your keyboard as your mouse. It is easy to use your mouse as keyboard in Windows using the On Screen Keyboard utility, but it is also possible to do the reverse.


Keyboard Mouse

All you need to do is:

Windows XP Users:-
  1. Go to Control Panel.
  2. Then click on Switch to Classic View.
  3. Then Click on Accessibility Options.
  4. Then Click on the Mouse Tab.
  5. Select Use MouseKeys.
  6. Click on OK.
  7. Then activate NumberLock (by pressing the NumLk key).
  8. You should hear a beep sound.
  9. Now you can control the mouse pointer using the arrow keys on the numeric keypad.
use keyboard as mouse


Windows 8, Windows 7 and Vista Users:

  1. Open Ease of Access Center by clicking the Start button , clicking Control Panel, clicking Ease of Access, and then clicking Ease of Access Center.
  2. Click Make the mouse easier to use.
  3. Under Control the mouse with the keyboard, select the Turn on Mouse Keys check box.

You can also increase the acceleration and speed of your mouse movements according to your needs.

You can alternately press the Alt+Shift+Num Lock combination to instantly activate the mouse keys.


Laptop Keyboard Mouse

For laptops, this will only work if your laptop keyboard has a numeric keypad or alternative keys which you can enable by pressing the Number Lock Key or the Function key.

On my laptop, number 6 key of the numeric keypad moves the mouse pointer left, number 4 key moves the mouse pointer right, number 2 key moves it down, number 8 key moves the mouse pointer up, number 5 and + key serve as right click while the number 0 key works as left click.

Make your Computer Talk

https://blogger.googleusercontent.com/img/b/R29vZ2xl/AVvXsEgoNIn3NlOSUQLJfJVs1_A6_2L99Up6VNXQjlkUl2oxX1OVkbETpJBH3i9A5dTKm50KdLp46-V-vtXOClVgBSD4nVdGD5NjORxQ8H5-Bg8FIE8riAzqAIHeaz_m6PBbP0gylCP87QBvtrj4/s1600/hn-spk.jpgHave you ever wondered how can you make your computer speak whatever you input to it like in the movies? Would it not be fun? If only it was possible! Rejoice, because now it is possible. Well, if you wish to know how to do this, then you have come to the right place. With this trick, you can create a script in Windows which will make your computer speak whatever you input to it.


To create one such talk script, follow the steps given below:-

Steps
  1. Open Notepad.
  2. Copy and paste the exact code given below.
          Dim Message, Speak
          Message=InputBox("Enter text","Speak")
          Set Speak=CreateObject("sapi.spvoice")
          Speak.Speak Message
    3. Click on File Menu, Save As, select All Types in Save as Type option, and save the file as Speak.vbs or "*.vbs".
    4.  Double click on the saved file, a window will open like the one in the image. Enter some text in enter text column and click OK.

Now your Computer will speak / talk what you typed in Step 4. Try it yourself.

Windows Compatibility: This VBS file can be executed on all versions of Windows including Windows XP, Windows Vista, Windows 7 and Windows 8.

Personal Experience: I personally showed this trick to many of my friends and they were literally left awestruck. You too can impress your friends by making your PC talk and be the Computer Wiz.

4/19/2014

Convert, Resize and Cut videos with VLC Media Player

VLC, the free and open source media player is great at playing media of even the most obscure formats. However, that is not all it can do. It can be used to easily convert videos from one format to the other. Converting videos with VLC media player is pretty fast and is in the league of most premium video converters in terms of quality. It can also be used to resize videos from one size to other for when you need to shrink videos to fit in your mobile devices. It can also serve as a quick video cutting tool.

Convert Videos with VLC Media Player

To convert videos with VLC media player, follow the steps given below:-

1) Open VLC media player.
2) Click on Media in the Menu bar.
3) In the dropdown menu, click on Convert/Save. Alternatively, you can directly press Ctrl+R to reach media options.

Convert Videos

4) Click on the Add button on the right of the File selection box to load the video whose format you want to change.
5) In the following dialog box, click on browse to select the destination where your converted video will be.

Change Video Format

6) In the profile selection option, select from a pre-configured profile of the output or customize it by clicking on the Settings icon on its right. You can select from a range of encapsulation, video and audio formats in the following dialog box if you wish to customize the output.
7) Click on Start to begin conversion.
8) VLC's progress bar will show progress. Do not close the player when it is converting videos as it will result in output video getting corrupted.

The speed with which VLC converts videos depends upon your computer's specifications. A faster computer converts faster while slower PCs take a lot of time. At the end of the conversion process, you will get the video in the format that you have selected in step 6.

Resize and shrink videos with VLC media player

Resizing the video involves making minor changes in the steps followed in conversion. While customizing the profile in step 6, go to the Video codec tab. Inside the Scale option, enter the desired width and height that you deem fit for your needs. After that, just convert the video as you normally would. This would result in the output video having the same dimensions that you specified. However, it is important to note that exact dimensions would only be achieved if the aspect ratio of the video is maintained. If the correct aspect ratio is not satisfied by your dimensions, VLC will take one of your dimension and change the other to satisfy it.

Resize Videos

Cut videos with VLC media player

To crop videos with VLC media player, go to the menu bar and click on View menu. Inside it, check Advanced Controls. This will result in a few extra buttons over the normal toolbar. Play the video of your choice and press the record button (from the newly added buttons) at the point in the video from where you want to start. Then, again press this button when the video reaches the point at which you want to stop it. The cut video will automatically be saved in your Videos library. It is located at Libraries/Videos in Windows 8.1, Windows 8, Windows 7 and Windows Vista. In Windows XP, it is located at My Documents\My Videos. You can use the Frame by Frame button to get a high degree of accuracy. You need to install the newer versions of this program as older versions do not support this.

Lock a Folder With Password Using Free Folder Protector

All of us have some files and folders that we consider private. They can be anything from our business documents to pictures of friends and family. These are files that we don't want other people using our computer to know about. As Windows offers no way to protect our private information, most of us get in awkward situations when these files are discovered by unwanted people.


Lock Folder Windows
Surely, you can store this information in a hidden folder. The only problem is that anyone can easily search the contents of a hidden folder using Windows Search itself.

The only viable solution is storing this content in a password protected folder so that only those people knowing the password of the folder can access it. There are many folder locking programs available online but the problem is that most of the good ones are paid. Even if you do manage to get a good free one, you will be looked at suspiciously when people see a folder locker in the list of your installed programs.

If you too find yourself in a similar situation, you can try Folder Protector, a password protector for Windows folders that is not only free but is also portable meaning that it does not need to be installed. Just click on the exe file and the program will start running. I have created this program based on suggestions and feature requests that I have received by email over the last two years.

Folder Protector

Folder Protector offers each user a protected folder that can only be opened by entering the password in FolderProtector. Unlike most security programs, Folder Protector is small in size (nearly 58KB) and does not show the folder that it is protecting. This gives an additional advantage that people who don't know the password do not have a target to try and hack their way into. As the software is portable, you can hide it or even delete it after protecting your folder and no one will have a clue that it was used. Then whenever you need to access protected files, you can re-download the program from this page, enter the password and access your protected files.

Download Folder Protector

Download for Windows 8, Windows 7 and Windows Vista

Download for Windows XP


How to use Folder Protector?
When you run Folder Protector for the first time, the program will ask you for a password that you want to use. Enter a password that you can remember as this will be the password to your protected folder.

After entering the password, the program will open a folder named SecuredFILES. This is your protected folder. You can add all your private files in this folder. This folder is located at the Desktop. After adding all your files, you may close this folder.

Then, you can use the menu in the program to lock your folder. To lock the folder, type lock as your action. After successfully locking the folder, FolderProtector will display that the folder is locked.

Unlocking the protected folder is easy. Just type unlock as your action. Then the program will ask you to enter your password. Upon successfully entering the password, the program will display the contents of your protected folder.

Changing the Password: Just type change as your action. The program will ask you for your current password. Upon successful entry of the current password, the program will ask for your new password and change it instantly.

Acknowledgment: This software has been made possible only through the suggestions of readers of this blog, especially Ernell Albert Galido for his idea of using a menu based interface.

Windows Compatibility: This program has been successfully tested on Windows 8, Windows 7, Windows Vista and Windows XP.

Support and Development
I will continue to develop this software further. So, your suggestions are invited. If you face any problem while using this software, you can use our support page and expect a quick reply.

Useful Keyboard Shortcuts for Windows Computers

Keyboard Shortcuts WindowsWhile most of us are already aware of obvious keyboard shortcuts like “Alt+F4” and “Ctrl+C”, there are some obscure shortcuts which most of us tend to overlook. These keyboard shortcuts are not only useful for the average PC user but for advanced users as well. This article contains many such amazing keyboard shortcuts which if used properly could save a lot of time and effort. So let's get started.

Windows key+D: This shortcut is the keyboard equivalent of “Show the Desktop”. It is useful for quickly minimizing every open window when someone walks in and you are doing some private work.


Ctrl+Shift+Esc: This shortcut directly starts the task manager. While Alt+Ctrl+Del used to bring up the Task Manager in Windows XP and earlier versions, in Windows 8 and Windows 7, it just brings up the lock this computer screen.

Ctrl+Click: This shortcut is useful for opening a link in a background tab. This is useful when you have to load a page without leaving the current one.

Alt+Print Screen: takes the screenshot of the current active window as opposed to just Print Screen which takes the screenshot of the entire screen.

Shift+Click for Yes to All and No to All: If you have a lot of dialog boxes asking yes and no question, just shift+click Yes or No on one to yes all or no all.

Ctrl+C on an error dialog box to copy its contents: Suppose your computer is giving an error message and you want to copy its contents to send to the support guy, what do you do? Just press Ctrl+C while the dialog box is highlighted and its contents will be copied to your clipboard.

Ctrl+T: This keyboard shortcut opens a new tab in internet browsers.

Ctrl+Shift+T: Reopens the last closed tab.

Ctrl+Shift+N: This shortcut opens a new incognito window in Google Chrome.

Ctrl+Shift+P: Opens a new private window in Mozilla Firefox.

Alt+Enter after writing the domain name in the address bar of your browser to insert .com automatically.

Shift+Enter inserts .net domain name extension.

Ctrl+W: This shortcut closes the current tab in your browser quickly.

Ctrl+Backspace: This shortcut deletes the last word you have typed. It is useful in case you typed in a wrong word and want to delete it quickly.

Ctrl+Left or Right Arrow key: This shortcut allows you to move the cursor one word at a time instead of the default one character at a time.

Ctrl++: This shortcut allows you to zoom in web pages in web browsers. Useful when text on a web page is too small to read properly. Ctrl+Scroll wheel can also zoom in documents, file thumbnails and icons in Windows 8, Windows 7 and Windows Vista.

Ctrl+-: This shortcut does the reverse of the previous shortcut.

Ctrl+0: Reset the webpage's zoom.

Windows key+M: Minimizes all the open windows.

Ctrl+L: This shortcut allows you to quickly jump to the address bar of your web browser.

Windows key+Pause/Break: Quickly open the system properties dialog box.

Ctrl+Shift+Delete: This shortcut opens the option to delete your browser's history, cookies, cache and other details that it stores while you browse the internet. This shortcut is extremely useful for the privacy conscious.

Windows Key+L: This shortcut locks your computer.

Ctrl+H: makes the history appear.

CTRL+B: Bold CTRL+U: Underline CTRL+I: Italic.

Alt+Select: This shortcut allows you to select rectangular blocks of text in Word processors, something that is not possible with simple select.

F2: Allows you to rename the selected file.

Holding Shift while inserting a device with removable storage prevents automatic run.

Ctrl+F: This keyboard shortcut opens the Find option in any program.

Ctrl+S: If you are working on a software and want to quickly save your progress, this shortcut will come in handy.

Ctrl+Home and Ctrl+End: Useful for quickly going to the top and bottom of a page.

Ctrl+P: Useful for printing the current page.

Space Bar: While viewing a web page in a browser, pressing space bar moves the page down.

Alt+Tab: Useful for quickly cycling between running applications. Press along with Shift to cycle backwards.

Ctrl+Tab: Cycle between tabs in your browser.

Ctrl+F5: Clears the cache and refreshes the current tab.

Shift+Right click: Open alternate right click options.

Alt+Double click: Open the file's properties. Alt+Enter can also be used for this.


These are some keyboard shortcuts that I found extremely useful. If you know some more useful keyboard shortcuts, do mention them in the comments.

Install Windows 8, 8.1 or 7 from a USB Flash drive

Windows is sold in the form of DVDs and downloadable ISOs. The Windows DVD can be put into an optical drive for easy installation. However, with the advent of ultra portable devices and tablets that do not have optical drives, installing Windows from the setup DVD becomes a problem. The only solution for these devices is to install Windows from a USB device such as a flash drive.

There are many other reasons why despite having an optical drive, you might want a bootable USB device for installing Windows. One is that installing Windows from a flash drive is a lot faster than that from a DVD. Creating a flash drive for installing Windows is not as simple as copying the setup files to it as it will not be bootable. To make it bootable, you need to use special software.

There are many third party software to create bootable USB devices but given the fact that most people aren't comfortable with third party software, Microsoft has released an application called Windows 7 USB/DVD download tool. Although the program's name makes it feel that it only supports Windows 7, that isn't really the case. It works well for preparing a bootable USB device for installing Windows 8 and Windows 8.1.


Install Windows from USB Flash drive

Before you begin, you must make sure that your flash drive has a storage capacity of at least 4GB. Also, you need to make sure that you have an ISO file of the Windows setup DVD with you. If you do not have the ISO file, then you need to create an ISO file from your setup DVD using a free program like ISOCreator.

Steps to Install Windows from USB flash drive


1. Install Windows 7 USB/DVD download tool. To install this program, you need .NET Framework version 2.0 or higher. The program runs perfectly on Windows 8, Windows 8.1, Windows 7, Windows Vista and Windows XP. Also, you need to be in an administrator account.

2. Open the program. Enter the location of your Windows ISO file in the source file box. Alternatively, you can browse to it and click Next.

3. On the choose media type screen, select USB device to create a bootable Windows installation flash drive.

4. On the insert USB device screen, select your USB flash drive or the external hard drive to which you want to copy the setup files and click Begin copying. If your USB device does not have enough space, you will be shown a dialog box saying so. Click Erase USB device. This will format your USB device and delete all data on it.

Tip: If you accidentally delete the data in your USB device in the previous step, you could still recover it with free tools.

5. If everything goes right, you will see a Bootable USB device created successfully message on the next screen.

6. Now, you need to boot from the USB device you just created to start the Windows installation process. If your computer doesn't boot from it, you might need to change the boot order. Also, you must note that older computers won't boot from a USB drive that is formatted as NTFS which is what the Windows 7 USB/DVD download tool formats it into while you select Erase USB device option. To overcome this, you should make sure that your device is formatted as FAT32 and has enough disk space.


If it complains that it is not a valid ISO file, you need to make sure that your Windows ISO is original and has not been modified in any way. If you are still unable to install Windows from a USB drive, just add a comment.

4/17/2014

What is Runtime Error r6034 and How to Fix It?

Create Run Commands
There is no doubt that Microsoft Windows is the most widely used operating system in all parts of the world. Apart from being simple to use, it is quite rich in features as well, which makes our lives quite easy.
The Run command available on Windows operating system is one such power packed feature that lets you to open a document or an application instantly with the help of just 1 command. So, rather than clicking several icons or using multiple commands, you can use the Run command to open any program or document instantly. For that you will need to Create Run Commands for any software of your Choice which you use Frequently.
But, do you know how to Create Run Commands of your Own? Well, it is really easy, which involves just few steps. Through this article, I will help you understand how to access your favorite applications by creating custom Run commands.

Open Run Command:

Before I show you how to create your own Run commands, let’s take a quick look on how to open Run Command. First of all, you need to open the Run window by just pressing the Windows Key along with the R key, i.e. Windows + R. Now, you have to type the name of the program that you desire to open up or execute. Unfortunately, not all programs can be accessed through this method. So, let me show you how to create Run commands that do not come as inbuilt commands.

Steps to Create run commands of your own


Step 1. The first step is to select the software or application for which you want to make custom Run command. For example, let us consider Google Chrome as the example here. Remember, you can choose any application other than which is already there in the Run command.

Step 2. In the second step, right click on the desktop of your computer system and make a new shortcut.
Right click > New > Shortcut

Step 3. As you select the Shortcut option in the 2nd Step, it will open up a dialog box. And, the dialog box will ask you path of the application or software for which you want to create the Run command.

Step 4. Now, you need to browse through the files and choose the one that shows “chrome.exe”. Well, it is quite obvious that all the executable files can be found in the C drive (or wherever the Operating System has been installed), inside the folder “Program Files”. For example, “C:\Program Files\Google Chrome\chrome.exe

Step 5. Once you are done with Step number 4, just click on “Next” button and simply provide a relative name to that shortcut. Remember, the same name will be used later in the Run command.
For example, “GC” for Google Chrome

Step 6. Now, click on the “Finish” button. Once it is done, an icon related to that application or software will show up on your computer’s screen. It means that the process of creating shortcut has been done successfully.

Step 7. In this step, just cut and paste that recently made shortcut icon into your computer’s root drive, in its Windows folder.
For example, C:\ Windows , Make sure you are the administrator of the computer or have its password.

Step 8. Now, you are done with the set up and can run the application through Run Command. Just go to Run and enter the keyword “GC”, and Google Chrome will begin executing.

Convert any Video to ASCII using VLC Media Player

VLC is a video player with a lot of tricks. While you definitely would be aware about converting videos with it, the feature of converting any video to ASCII is one that is slightly less known. As ASCII version of movies like Star wars are very popular online, I think this feature of this amazing media player can be used to have lots of fun.

VLC ASCII
An example of a video in ASCII form

All you need to do is open any video and VLC will automatically display its converted form. To convert any video in ASCII, just follow the steps given below:-

1) Open VLC Media Player.
2) Click on the Tools menu and in the drop down list, click on Preferences at the bottom of the list.
3) Click on Video icon in the left sidebar.
4) Click on the drop down box next to Output.
5) Select "Color ASCII art video output" from the drop down list.
6) Click Save and restart VLC.

Older versions of VLC might require you to modify these settings under the Advance tab or All Settings tab. As VLC runs on a variety of OSs, this trick will work on any PC capable of running this media player. However, it is interesting to point out that older PCs having poor hardware will slow down and give a stuttered output.