4/22/2014

Shutdown Your Computer or a Remote PC via Command Prompt

Most of us shutdown our computers using the power button given in the Start menu. Some of us use the physical power button on our machines. Very few people actually use other means of shutting down a computer and even less is the number of people who use the command prompt to shutdown a computer.

A reason for this is that most of us don't know that the command prompt can be used to not only shutdown, restart or log off our computer instantly but also to shutdown a remote computer provided you have administrative access. It can also be used to hibernate a computer and give a comment containing the reason for shutdown. This post will show you how to do all this.


Shutdown computer with command prompt
Required
A computer running Windows (XP, Vista, 7 or 8) with the command prompt working perfectly, i.e. not disabled by a virus.

Initial Steps
1) Press Windows Key + R.
2) Enter CMD and press Enter.

This will start the command prompt. Follow the instructions below depending on what you want to do.

Shutdown Local Machine (Your Computer)
Type "shutdown -s" without the quotes in the command prompt and press Enter. Shutdown is the command being executed and the switch -s tells the computer to shutdown.

Restart your Local Computer
Type "shutdown -r" in the command prompt and press Enter. In this case, the command switch -r is telling the computer to restart after shutdown.

Log Off the Current User
Type "shutdown -l" in the command prompt and press Enter. The -l command switch tells the computer to log off.

Shutdown a Remote Computer
Type "shutdown -s -m \\name of the computer" in the command prompt and press Enter. Replace \\name of the computer with the actual name of the remote computer you are trying to shutdown. As mentioned earlier, you must have administrative access to the computer you are trying to shutdown. To know if you have administrative access, press Windows key + R and then type the name of the computer and press Enter.

Note: If you don't remember the name of the remote computer, you can look for it by opening a list of all the computers you are connected to by executing "net view" in command prompt.

If you can connect to the computer, you will be asked to login with your username and password. Upon entering them, a window will display the list of all the directories available to you. This should help you know whether you can or cannot shutdown the remote computer.

Hibernate a Local Computer
Type in "Rundll32.exe Powrprof.dll,SetSuspendState" without the quotes and press Enter. Your computer should hibernate, if it does not, then you must enable hibernation to do this.

Shutdown your or a remote computer after a specific time
Type "shutdown -s -t 60" to shutdown your computer after 60 seconds. Upon executing this, a countdown timer displaying a warning message will be shown. This command uses the -t command switch followed by a variable (which is 60 in this case) which represents the number of seconds after which the computer will shutdown.

Display a Message containing the reason for shutdown
Type shutdown -s  -t 500 -c "I am tired. I don't want to work anymore." (with the quotes) in the Command Prompt and press Enter. The -c switch is used in the code to give the reason for shutting down and what is followed in quotes will be displayed in the dialog box as the reason. This can be used to display all sorts of funny messages. One example :-

Skynet has become self aware. John Connor did not stop me. You can not use your PC anymore.

Stop a System Shutdown
Type "shutdown -a" and press Enter. This will stop the system from shutting down if the countdown to shut down has not reached 0.

How to Start Windows in Safe Mode Easily

Safe Mode is a special diagnostic mode in which Windows runs with the minimum amount of features. As the features are limited, Windows does not load unnecessary startup items and runs only those files and drivers that are necessary for the basic functioning of the operating system. This allows users to remove recently installed programs that might be preventing Windows from starting correctly. As Windows does not start unnecessary programs while in Safe Mode, Safe Mode can also be used to remove viruses and malware that cannot be removed normally without risking the infection getting worse.


Start Safe mode Windows
There are different ways in which you can get into the Safe Mode in Windows. They depend on the version of Windows you are using.

In this article:
  1. Steps for Windows 8 users
  2. Steps for Windows 7, Windows Vista, Windows XP and users of previous versions
  3. Force Windows to start in Safe mode
  4. Which Safe Mode option should you choose?

Windows 7, Windows Vista, Windows XP and Previous versions

If you are using these versions of Windows, you can try the following methods.

The Trusted F8 key method
1) Restart your computer if it is on.
2) Right before the system starts to boot, start tapping the F8 key continuously.
3) This should load the Windows Advanced Options boot menu.
4) Select a Safe Mode option based on your need using the arrow keys and press Enter.
5) Windows will start in Safe mode. To get out of Safe mode, simply restart your computer.

This method should work on Windows 7, Windows Vista, Windows XP, Windows 2003 and Windows ME. However, if it does not, you can always force Windows to boot in Safe Mode if your computer is working "properly".

Faulty Startup Method
If the F8 key method does not take you to the Advanced Options boot menu, you could try turning your computer off when it boots into Windows. Upon next restart, Windows will notice that the computer did not boot successfully and take you to the Advanced Options boot menu. Then, select a Safe mode option based on your need. This method is risky and should only be tried as a last resort. It could result in some of your files being deleted which could make your Windows installation unusable.

Windows 8

The F8 key method does not work on Windows 8. Hence, getting onto Safe Mode requires the following steps:-

If your PC is working properly:
1) On Windows 8 Start Screen, type Advanced. In the search results, click on the Settings category.
2) Click on Advanced startup options.
3) Under the Advanced Startup heading at the bottom of the General Settings screen, click on Restart now.
4) Your computer will restart and you will be taken to the Advanced Startup Options menu. To easily reach this menu, on Windows 8 start screen, you could choose restart while holding the Shift key.
5) Click on Troubleshoot and then on the Advanced Options button.
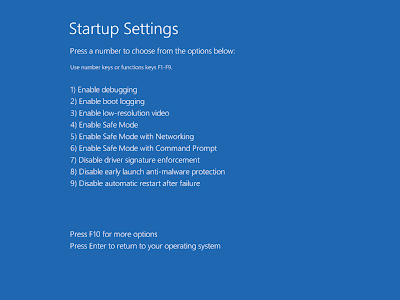
6) Now, click on Startup Settings.
7) At the Startup Settings Screen, click on Restart.
8) Your computer will restart to Advanced Boot options from where you can choose a Safe mode option based on your need.

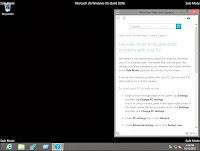
Windows 8 Safe mode

You can also force Windows to start in Safe mode.

If your PC is not working properly:
Windows 8 monitors your PC's startup for problems and when an error is detected, it automatically takes you to the new Recovery mode with the message "Recovery. It looks like Windows didn't load correctly." In this case:-

1) Select Advanced Repair Options and then click on Troubleshoot.
2) Click on the Advanced Options button.
6) Now click on Startup Settings.
7) At the Startup Settings Screen, click on Restart.
8) Your computer will restart to Advance Boot Options from where you can choose a Safe mode option based on your need.

Force Windows to restart in Safe Mode using the System Configuration Utility

Most users looking to boot Windows in safe mode will have a computer that is not working properly. Unfortunately, this method will not help them as it requires the user to have a working computer.

Start Windows in Safe mode

Steps:
1) On Windows 7, Windows Vista, Windows XP and previous versions of Windows, click on Start. Go to Run in Windows XP and previous versions and go to Search in Windows 7 and Vista. On Windows 8, go to the Start screen. Alternatively, press Windows key+R to load the Run dialog box.
2) Type msconfig and press Enter.
3) This will start the System Configuration Utility.
4) On Windows XP, go to the BOOT.INI tab and check /SAFEBOOT. On Windows 8, Windows 7 and Windows Vista, go to the Boot tab and check Safe Boot.
5) Click OK.
6) Click on Restart in the following dialog box.-

Your computer will restart in Safe mode.

Different Safe Mode Options. Which to choose?

These are the various safe mode options available in Windows. You can choose one based on the features you require.


Safe Mode
This is safe mode in its most basic form without any extra features. It is useful for troubleshooting most common problems .

Safe Mode with Networking
This offers additional support of connecting to the internet or any other network. This is useful when your PC has a problem which might require you to frequently use the internet to troubleshoot.

Safe Mode with Command Prompt
This option will allow you to use all the unique features of the Windows command prompt while in Safe mode.

Convert FAT32 to NTFS Without Formatting or Losing Data

You have a flash drive or probably an external hard drive that currently has FAT32 file system and you want to change it to NTFS, because FAT32 does not support handling large files (over 4GB) or it is just simply old for your taste but there is just one problem, you don't want to lose your saved data. This article is for you then as it explains exactly how you can achieve seamless transition from FAT to NTFS without involving any data loss.


FAT32 to NTFS

While it is generally recommended to use the NTFS file system because of its stability, security and lesser defragmentation time, most of us end up using FAT32 because that is what most disks are preformatted with. Unless, we notice the “Not enough disk space error” despite disk space being available, we don't bother to change the file system. Moreover, most of us don't change it because of the risk of losing important data and lack of time (read laziness). As Microsoft was aware of this scenario, they added a capability in the command prompt to overcome this by executing a simple command. There are many software that support this too but the Convert command is one of the easiest ways to do so. Follow the steps below to know how:-

Important: While this method works perfectly, I would still advise you to backup your data in case anything goes wrong.

FAT 32 to NTFS Conversion Steps

1) Go to Computer, and note the name of the drive whose file system you wish to convert.
2) Click on Start.
3) Type cmd in the search bar if you use Windows 7, Windows 8 or Windows Vista. If you use Windows XP, click on Run and then execute cmd.
4) Execute "chkdsk h: /f " (without quotes) where H is the letter of the drive to undergo conversion. This checks the drive for errors and fixes them automatically.
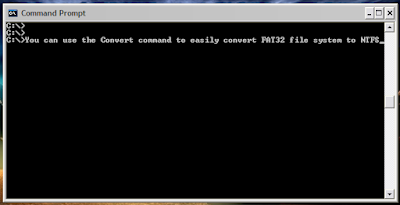
5) Execute "Convert H: /FS:NTFS" (without quotes). H is again the letter of the drive to be converted.
6) The command prompt will start the conversion process and after a few minutes, CMD will say that conversion was successful.
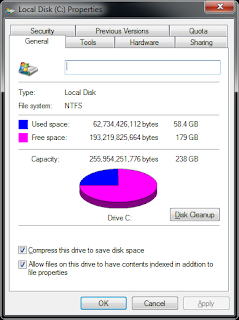
7) You can check it in the properties of the drive through right click<Properties.

Convert FAT to NTFS

This works on Windows 7, Windows XP, Windows 8 and Windows Vista. I converted my flash drive's file system using these steps and it worked flawlessly. It is interesting to note that this method cannot be used to reconvert NTFS file system back to FAT32. To reconvert back to FAT32, you will need to format the entire drive which will definitely cause data loss.

ALLPlayer 5.4.3


ALLPlayer is one of the most popular programs for watching movies with matching subtitles. It plays all known media formats, RAR files, and futhermore has an implemented LiveUpdate function to update the latest codecs if there is a problem with opening a movie file.


OS Requirement Windows XP, Windows 2003, Windows Vista, Windows 7
License Freeware File Size 37.15 MB
Version 5.4.3
Date Added Wed 22, 2013 at 02:31 pm


Any Video Converter 5.0.4


Any Video Converter is an All-in-One video converting tool with easy-to-use graphical interface, fast converting speed and excellent video quality.


OS Requirement Windows XP, Windows 2003, Windows Vista, Windows 7
License Freeware File Size 35.49 MB
Version 5.0.4
Date Added Wed 22, 2013 at 02:54 pm

                  http://www7.any-video-converter.com/avc-free.exe

Ozone 6 PLE


Ozone 6 implements the cutting-edge technologies developped by e-on software for the simulation and rendering of atmospheric effects. Its atmospheres provide an accurately simulated environment that affects all elements of your scenes and behaves according to nature’s rules.


OS Requirement Windows XP, Windows 2003, Windows Vista, Windows 7
License Freeware File Size 167 MB
Version 6 PLE
Date Added Thu 27, 2013 at 02:47 pm

 http://ple.e-onsoftware.com/Ozone6PLE.zip

Codec Pack All-In-1 6.0.3.0


Do you download movies and get confused by all the different formats and codecs? Now you don't need to worry about downloading your movie codecs separately. You can do it all in one go and be ready for any video format that comes your way.


OS Requirement Windows XP, Windows 2003, Windows Vista, Windows 7
License Freeware File Size 9.59 MB
Version 1 6.0.3.0
Date Added Wed 22, 2013 at 03:13 pm

                     http://www.softpedia.com/progDownload/Codec-Pack-All-in-one-Download-2664.html